To connect a doorbell camera to Wi-Fi, simply follow these steps: open the camera’s app, go to the settings menu, select Wi-Fi settings, and enter the Wi-Fi network name and password. By completing these steps, you will successfully connect your doorbell camera to Wi-Fi.
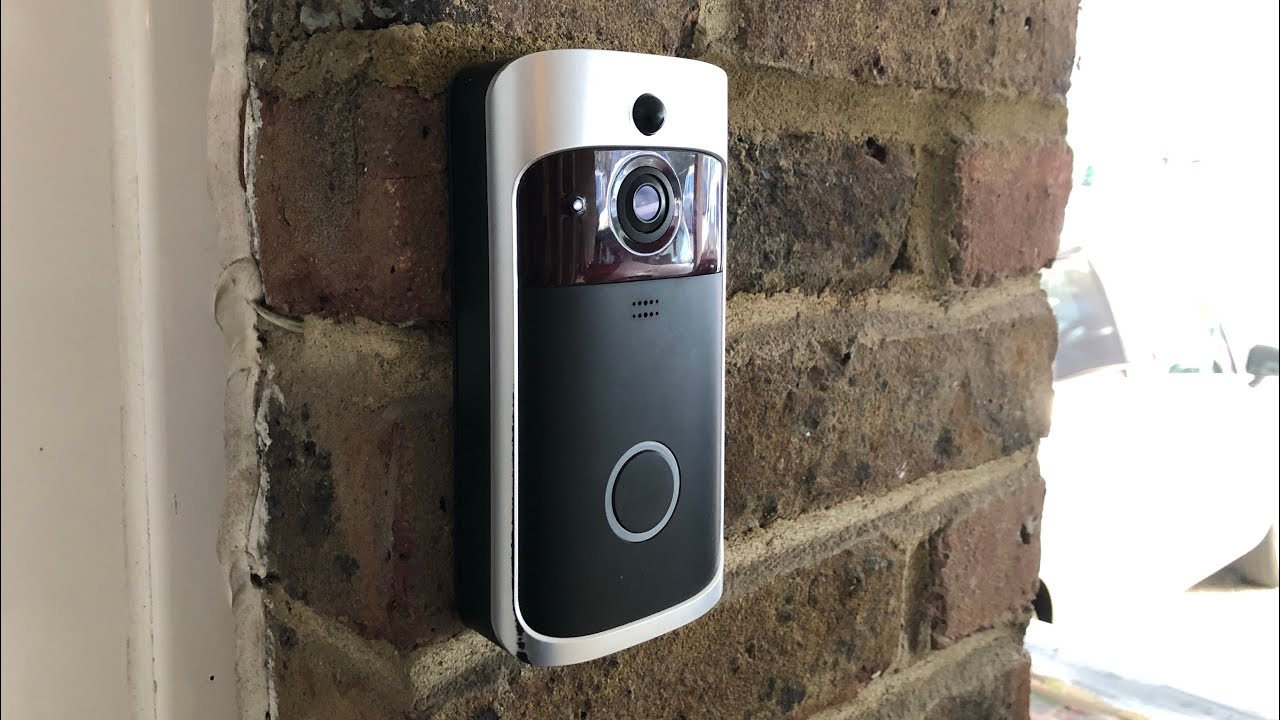
Doorbell cameras have become increasingly popular in recent years, allowing homeowners to monitor their front doors remotely and enhance their home security. These cameras, which are typically connected to a smartphone app, can send real-time alerts and enable users to answer their door from anywhere.
To make the most of this technology, it is crucial to connect your doorbell camera to Wi-Fi. We will discuss the steps to connect your doorbell camera to Wi-Fi and enjoy the benefits of smart home security.
Checking The Requirements
In order to successfully connect your doorbell camera to Wi-Fi, there are a few necessary equipment and tools that you will need. Firstly, you will require a doorbell camera that is compatible with Wi-Fi networks. It is important to ensure that the camera you choose supports the Wi-Fi frequency of your home network. Some cameras may only work with 2.4GHz networks, while others may be compatible with both 2.4GHz and 5GHz networks.
Additionally, you will need a Wi-Fi network with a strong and stable internet connection. A reliable Wi-Fi network is crucial for seamless connectivity and real-time video streaming. Moreover, make sure that your router is not placed too far away from the location where you plan to install the doorbell camera. This will help ensure a strong Wi-Fi signal and avoid any connectivity issues.
Connecting To The Wi-fi Network
To connect your doorbell camera to Wi-Fi, you need to access the doorbell camera settings. Follow these steps to get started:
- Locate the Wi-Fi settings option in the doorbell camera settings menu.
- Enter your Wi-Fi network name (SSID). Make sure to enter it correctly to establish a connection.
- Enter your Wi-Fi network password (PSK). Double-check the password to avoid any errors.
Once you have entered the correct network name and password, your doorbell camera will attempt to connect to your Wi-Fi network. It may take a few moments for the connection to establish. Once connected, you can enjoy the benefits of accessing your doorbell camera remotely through your Wi-Fi network.
Ensuring Proper Network Signal Strength
To ensure a proper connection between your doorbell camera and Wi-Fi, it is important to evaluate the camera’s connection strength. One way to do this is by assessing the location of your Wi-Fi router. Relocating the router closer to the doorbell camera can help improve the signal reception. By reducing the distance and obstacles between the two devices, you can enhance the strength of the connection. It is also important to consider any potential interference from other electronic devices or objects that may obstruct the Wi-Fi signal. By identifying and addressing any issues with the network signal strength, you can ensure a reliable connection between your doorbell camera and Wi-Fi.
Verifying Wi-fi Network Compatibility
Verifying the compatibility of your Wi-Fi network with your doorbell camera is an essential step to ensure a seamless connection. Start by checking if your router is compatible with the doorbell camera. You can do this by referring to the manufacturer’s specifications or consulting their website for a list of compatible devices.
If your router is not compatible, you may need to update the firmware to ensure compatibility. Updating the router firmware is typically easy and can be done through the router’s admin panel. Check your router manufacturer’s website for instructions on how to update the firmware.
| Step 1 | Check doorbell camera manufacturer’s website for compatible routers |
| Step 2 | If router is not compatible, update the firmware |
| Step 3 | Follow instructions provided by router manufacturer to update firmware |
By ensuring the compatibility of your Wi-Fi network and updating your router firmware if necessary, you can successfully connect your doorbell camera to Wi-Fi and enjoy its functionalities without any hiccups.
Resolving Connection Failures
Having trouble connecting your doorbell camera to Wi-Fi? Don’t worry, we’ve got you covered! One of the most common issues users face is connection failures. To resolve this, you can try resetting the doorbell camera. This can be done by locating the reset button, typically found on the device itself, and holding it down for a few seconds until the camera resets.
If resetting the camera didn’t work, another troubleshooting step you can take is power cycling your router and modem. Simply unplug them from the power source, wait for about 30 seconds, and then plug them back in. This can often help refresh your network connection and resolve any temporary connectivity issues.
If you’re still unable to connect your doorbell camera to Wi-Fi, it may be time to contact customer support for further assistance. They have the expertise to guide you through more advanced troubleshooting steps and can help resolve any underlying technical issues.
Optimizing Router Placement
Optimizing the placement of your router is crucial to ensuring a strong and stable Wi-Fi signal for your doorbell camera. To achieve optimal signal distribution, you need to position the router strategically and minimize any obstructions or interference.
Firstly, choose a central location for your router, preferably on the main floor of your house, and avoid placing it near any metal objects or appliances that can interfere with the signal. Keep it away from walls and windows, as they can also weaken the signal.
Secondly, consider the height at which you place your router. Elevating it can help improve its range and avoid signal loss due to furniture or other objects on the ground level.
Lastly, try to minimize obstructions by placing the router free from any large objects or furniture that can block the signal. You can also adjust the antennas on your router to optimize signal strength, ensuring it reaches your doorbell camera effectively.
Utilizing Wi-fi Range Extenders
To connect your doorbell camera to Wi-Fi, you can utilize Wi-Fi range extenders to extend your Wi-Fi coverage to outdoor areas. Setting up and configuring a range extender is a straightforward process. Simply follow these steps:
- Find a suitable location for your range extender, ensuring it is within range of your existing Wi-Fi network.
- Plug in the range extender and wait for it to power on.
- Connect your device (such as a smartphone or laptop) to the range extender’s Wi-Fi network.
- Open a web browser and enter the range extender’s IP address to access the admin panel.
- Follow the on-screen instructions to connect the range extender to your existing Wi-Fi network.
- Once connected, you can place your doorbell camera within range of the range extender to ensure a strong Wi-Fi signal.
By extending your Wi-Fi coverage to outdoor areas, you can ensure a reliable connection between your doorbell camera and your Wi-Fi network.

Credit: www.amazon.com
Maintaining A Stable Wi-fi Connection
To connect your doorbell camera to Wi-Fi, it is crucial to maintain a stable and uninterrupted internet connection. This ensures smooth operation and reliable performance. One way to achieve this is by monitoring and addressing potential interference sources. These can include other devices in close proximity, such as cordless phones or baby monitors, that operate on similar frequencies. Identifying and relocating these devices can help prevent signal disruptions. Moreover, updating the firmware and software of your doorbell camera regularly improves its overall performance and ensures compatibility with the latest technology. By following these simple steps, you can effectively connect your doorbell camera to Wi-Fi and enjoy its benefits without any interruptions.
Frequently Asked Questions For How To Connect Doorbell Camera To Wi-fi
How Do I Connect My Doorbell Camera To My Wifi?
To connect your doorbell camera to your WiFi, access the camera’s settings in the corresponding app, select the WiFi option, and enter your network information. Press the camera’s reset button and wait for the connection confirmation.
Why Wont My Doorbell Connect To My Wifi?
There could be several reasons why your doorbell won’t connect to your Wi-Fi. First, ensure that your Wi-Fi network is compatible with the doorbell’s specifications. Next, try resetting both the doorbell and your Wi-Fi router. Check if there are any firmware updates available for the doorbell.
Lastly, make sure that you are within range of the Wi-Fi signal and that there are no obstructions causing interference.
How Do I Reconnect My Ring Doorbell To A New Wifi?
To reconnect your Ring doorbell to a new WiFi, follow these steps: Open the Ring app on your smartphone, go to the device settings, select the doorbell you want to reconnect, choose “Device Health,” tap “WiFi Network,” and then follow the prompts to enter your new WiFi details.
Then your Ring doorbell will be connected to the new WiFi.
How Do I Connect My Front Doorbell Camera?
To connect your front doorbell camera, follow these steps: 1. Install the camera near your front door using the provided instructions. 2. Download the camera’s accompanying app on your smartphone. 3. Follow the in-app instructions to connect the camera to your Wi-Fi network.
4. Once connected, you can access your doorbell camera through the app to view live footage and receive alerts.
Conclusion
To sum up, connecting your doorbell camera to Wi-Fi is a simple process that enhances the security of your home. By following the step-by-step instructions provided, you can easily ensure a smooth connection without any technical difficulties. With a connected doorbell camera, you gain the ability to monitor your doorstep and receive alerts, keeping you and your loved ones safe.
Don’t hesitate to take advantage of this technology for your peace of mind.

Leave a Reply